Add another thing: example
You can see a working example of the Add another pattern in the DWP Design System mock service: Order pizza. This mock service includes the routing and controls you need to create the illusion of data being stored, edited and deleted.
Follow the instructions on this page to use the pattern in your own prototype. This is not production-ready code and is only intended for use in prototypes.
Start the DWP Design System mock service
Set up
To get this up and running in your prototype you need:
- the GOV.UK Frontend package installed and configured. If you are using the GOV.UK prototype kit, you will already have this.
- some basic knowledge of how Express and HTTP methods work, especially
getandpost - a
routes.jsfile to control the data that’s passed around the components to create a realistic journey.
If you are using the GOV.UK Prototype Kit you can find the routes.js file at app/routes.js.
Development
Storing data in a session
This is the important part. To create the illusion of data being stored, edited and deleted, we will need to store data at specific parts of the user journey. In production this would usually occur after a form submission or page change.
The variable name used in this example is pizza. (Change this to something that makes sense for your prototype and change your input names to match.)
{{
govukInput({
    label: {
      text: "Who is this pizza for?",
      classes: "govuk-label--l",
      isPageHeading: true
    },
    hint: {
      text: "Name of the pizza eater."
    },
    id: "pizza-eater",
    name: "pizza[eater]",
    value: choice or ''
  })
}}
In the code sample above we’ve used name: "pizza[eater]". This will look a little confusing but we need to store each item in an array with each individual piece of data. The structure will look something like this when we get to the end of the journey:
{
eater: 'Bruno',
size: 'medium',
crust: 'italian',
sauce: 'Tomato',
cheese: 'mozzarella',
toppings: [ 'ham', 'pineapple' ]
}
The name that you give to each input will be stored in an object which will allow you to manipulate it later on in the journey.
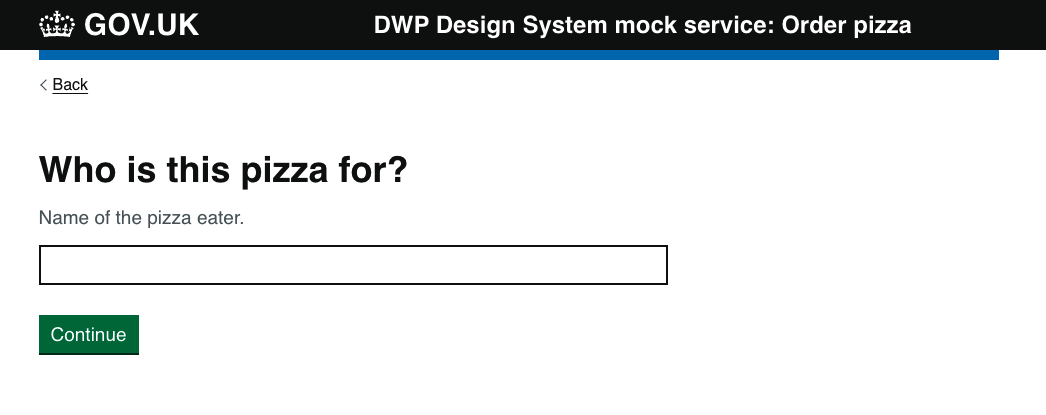
Who is this pizza for?
To begin with we will create the first step route. In this case it’s going to the be page asking who this pizza is for.

Components
govukInputgovukButton
Code
<form action="/select-size" method="post" novalidate>
{{ govukInput({
label: {
text: "Who is this pizza for?",
classes: "govuk-label--l",
isPageHeading: true
},
hint: {
text: "Name of the pizza eater."
},
id: "pizza-eater",
name: "pizza[eater]",
value: choice or ''
}) }}
{{ govukButton({
text: "Continue"
}) }}
</form>router.post('/select-size', (req, res, next) => {
res.render('pizza/size.njk')
})This will render the next page within the journey. Because we are using the prototype kit, this will automatically save any data provided in the govukInput field to the data object within our session:
data: { pizzaOrder: [], pizza: { eater: 'Daniella' } }You can see above that we have an object called pizza. This is the pizza for the journey we are currently building; we currently only have data for the eater.
You will also notice that pizzaOrder has been set as an empty array. This array will be used to store any number of pizzas within this order, and is where we will change and remove any pizzas.
Choosing size, crust, sauce and cheese
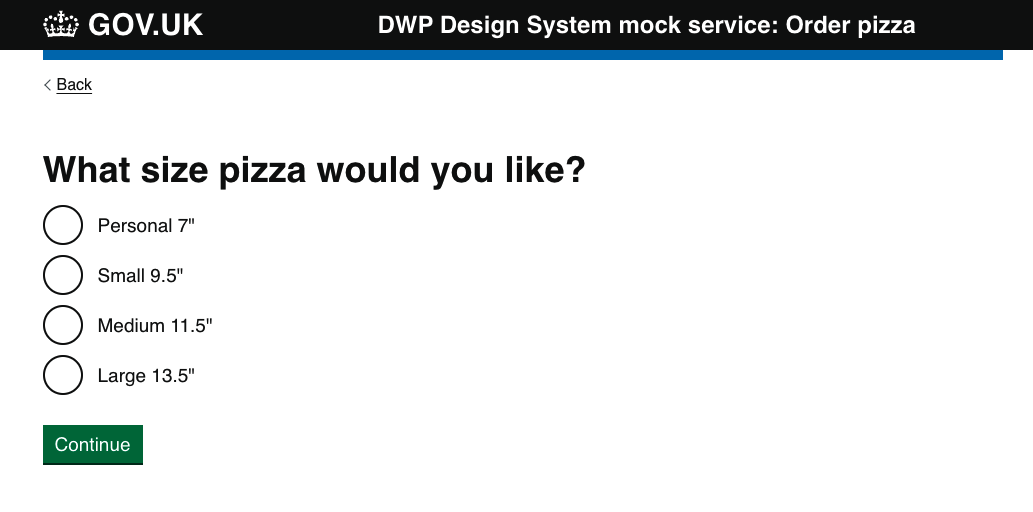
The second page within our pizza ordering journey asks the user to choose a pizza size.

Components
govukRadiosgovukButton
Code
{% if choice %}
{% set formAction = "/check-pizza" %}
{% else %}
{% set formAction = "/select-crust" %}
{% endif %}

<form action="{{ formAction }}" method="post" novalidate>

{{ govukRadios({
idPrefix: "choose-pizza-size",
name: "pizza[size]",
fieldset: {
  legend: {
    text: "What size pizza would you like?",
    isPageHeading: true,
    classes: "govuk-fieldset__legend--l"
  }
},
items: [
  {
    value: "personal",
    text: "Personal 7",
    checked: choice === "personal"
  },
  {
    value: "small",
    text: "Small 9.5",
    checked: choice === "small"
  },
  {
    value: "medium",
    text: "Medium 11.5",
    checked: choice === "medium"
  },
  {
    value: "large",
    text: "Large 13.5",
    checked: choice === "large"
  }
]
}) }}

{{ govukButton({
text: "Continue"
}) }}
</form>
The form code above has a conditional which will set the action of the form depending upon which part of the journey the user is currently in.
If they are ordering a new pizza the action will be set to /select-crust, which will progress them to the next section of the pizza ordering journey.
However if they have arrived here from the ‘Change’ link on the summary page the post action will be set to: /check-pizza, which will take them back to the summary page. The checked status of each input is set to true if the user’s choice matches the value of the radio button, so that the user sees their previous answer prepopulated.
The following pages crust, sauce and cheese all work the same way but with different values in the radio buttons and different content.
Choosing toppings
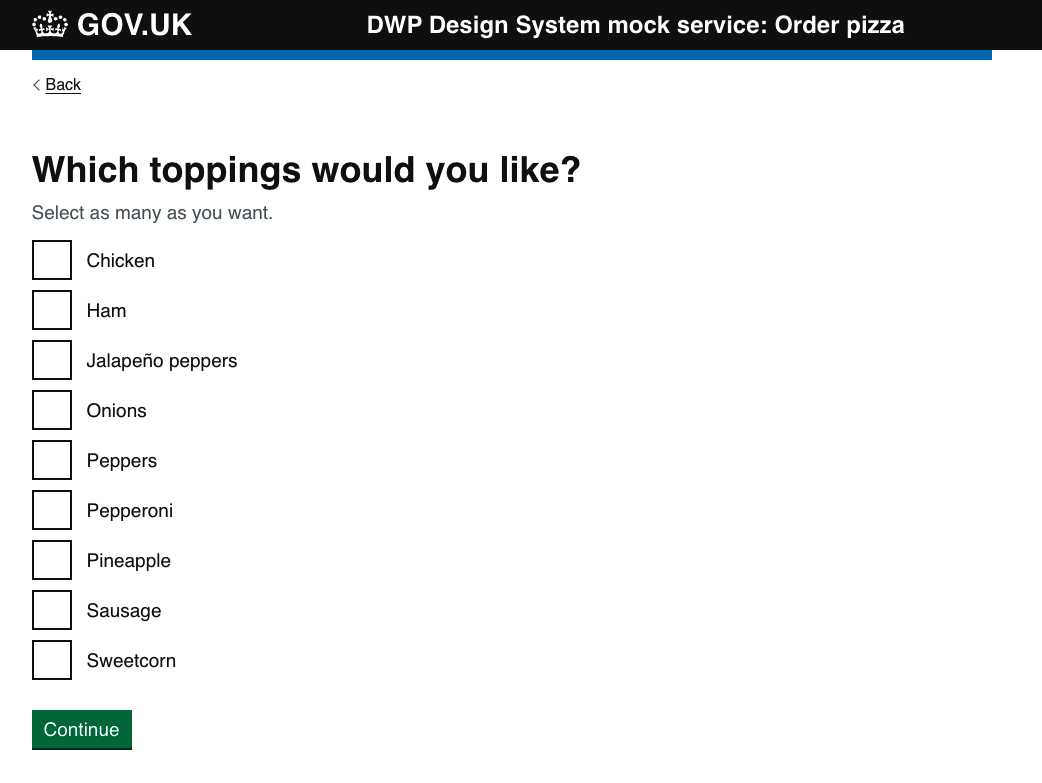
Because the toppings page allows the user to select several options, it uses checkboxes instead of radio buttons.

Components
govukCheckboxesgovukButton
Code
<form action="/check-pizza" method="post" novalidate>

{{ govukCheckboxes({
idPrefix: "choose-pizza-toppings",
name: "pizza[toppings]",
fieldset: {
  legend: {
    text: "Which toppings would you like?",
    isPageHeading: true,
    classes: "govuk-fieldset__legend--l"
  }
},
hint: {
  text: "Select as many as you want."
},
items: [
  {
    value: "chicken",
    text: "Chicken",
    checked: choice.includes("chicken") if choice
  },
  {
    value: "ham",
    text: "Ham",
    checked: choice.includes("ham") if choice
  },
  {
    value: "jalapeño",
    text: "Jalapeño peppers",
    checked: choice.includes("jalapeño") if choice
  },
  {
    value: "onions",
    text: "Onions",
    checked: choice.includes("onions") if choice
  },
  {
    value: "peppers",
    text: "Peppers",
    checked: choice.includes("peppers") if choice
  },
  {
    value: "pepperoni",
    text: "Pepperoni",
    checked: choice.includes("pepperoni") if choice
  },
  {
    value: "pineapple",
    text: "Pineapple",
    checked: choice.includes("pineapple") if choice
  },
  {
    value: "sausage",
    text: "Sausage",
    checked: choice.includes("sausage") if choice
  },
  {
    value: "sweetcorn",
    text: "Sweetcorn",
    checked: choice.includes("sweetcorn") if choice
  }
]
}) }}

{{ govukButton({
text: "Continue"
}) }}
</form>
This form is similar to the previous one, except that:
- we are using checkboxes
- the form action always goes to the same page,
/check-pizza
When we make a post request to the /check-pizza route, we need to do a couple of things:
router.post('/check-pizza', (req, res, next) => {

const { data } = req.session;
const pizza = data.pizza;

if(pizza.id) {
  amendPizza(data.pizzaOrder, pizza);
} else {
  // give pizza an id - to find in amend step
  pizza.id = data.pizzaOrder.length + 1;
  data.pizzaOrder.push(pizza);
}

res.render('pizza/check-order.njk', { pizza: data.pizza });
})
First we need to pull all the data from the session and extract the current pizza in the journey. In this case it’s going to be the last one that we made any changes to, whether that was adding a new pizza or changing an existing one.
Once we have the pizza stored in a variable, const pizza = data.pizza, we then need to check if it already exists in the pizzaOrder.
To do this, when a new pizza is added we give it an ID and then add it to the pizzaOrder array. If a user then changes that pizza with the ‘Change’ or ‘Remove’ links, we look for the ID of the pizza using the if statement above.
If the pizza already has an ID we go off to the amendPizza() function, passing in the full pizzaOrder and the individual pizza.
Changing a pizza
The next page allows the user to check, change and remove pizzas from their order.
The amend pizza function is simple enough to exist within a prototype. It will just find the index of the pizza ID within the pizzaOrder array, take it out and replace it with the amended pizza.
Code
const amendPizza = (pizzas, pizza) => {
  const index = pizzas.findIndex(p => p.id === pizza.id);
  pizzas.splice(index, 1);
  pizzas.push(pizza);
  return pizzas;
}
Get in touch
If you’ve got a question, idea or suggestion email the Design System team on dwp-design-system@engineering.digital.dwp.gov.uk